


📱 Introduction
React Navigation has a number of different systems to use:
stack navigation
drawer navigation
bottom tab navigation
The basic setup for each of those isn't very complicated (refer to the documentation and their examples), but customising the functionality and appearance can be a little tricky.
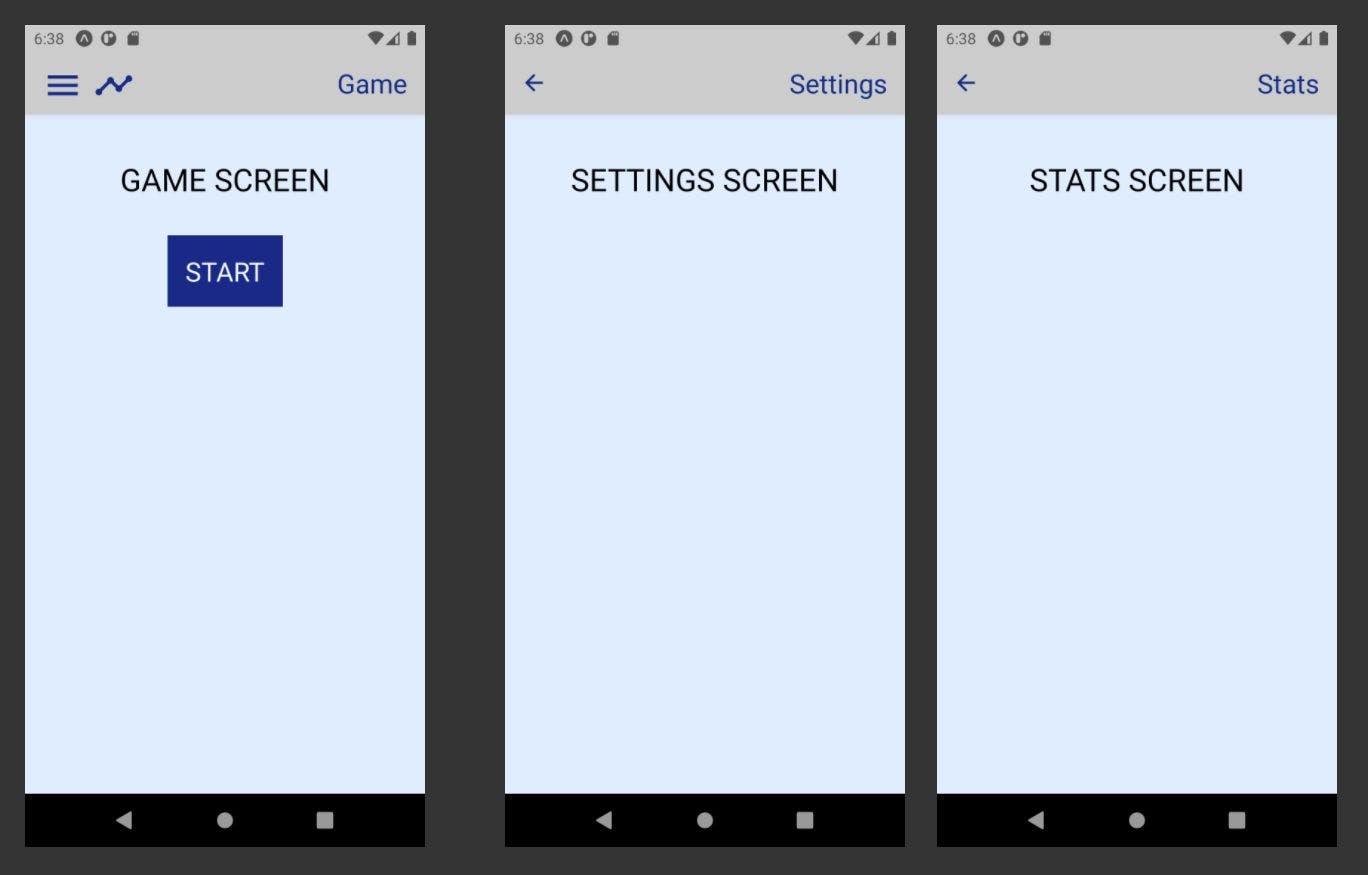
In this post, I'll concentrate on the Stack Navigator. I have a simple Game Mock App with a Game Screen (the Start button doesn't do anything), and a Stack Navigation at the top with two icons to open either a Settings or a Stats screen, both with a back arrow/button to return to the Game screen.
📱 Setup
To get started, there's a whole bunch of packages that want to be installed:
npm install @react-navigation/native
npm install @react-navigation/stack

npm install react-native-reanimated react-native-gesture-handler react-native-screens react-native-safe-area-context @react-native-community/masked-view
All parts that need to have access to the navigation need to be wrapped with a component <NavigationContainer\>, so typically you wrap your outermost <App> component. Its direct child is the Navigator, and the children of the Navigator are the different screens. This is the basic setup:
App.js
import React from 'react';

import GameScreen from './stackScreens/GameScreen';
import SettingsScreen from './stackScreens/SettingsScreen';
import StatsScreen from './stackScreens/StatsScreen';

import { NavigationContainer } from '@react-navigation/native';
import { createStackNavigator } from '@react-navigation/stack';

const Stack = createStackNavigator();

export default function App() {
  return (
    <NavigationContainer>
      <Stack.Navigator>
        <Stack.Screen
          name="game"
          component={GameScreen}
          options={{ title: 'Game' }}
        />
        <Stack.Screen
          name="settings"
          component={SettingsScreen}
          options={{ title: 'Settings' }}
        />
        <Stack.Screen
          name="stats"
          component={StatsScreen}
          options={{ title: 'Stats' }}
        />
      </Stack.Navigator>
    </NavigationContainer>
  );
}
The problem with this: you can't use the navigation header for navigation links. You'd need buttons on the screen component itself.
Right now, the only thing configured in the options prop is the title that will be shown in the header. Instead of passing an object, you can also pass a function to render a custom <NavHeader> component.
Here's how you'd modify the <Stack.Screen /> options:
<Stack.Screen
  name="game"
  component={GameScreen}
  options={({ navigation }) => {
    return {
      headerTitle: () => (
        <NavHeader
          navigation={navigation}
          title="Game"
          showIcons={true}
        />
      ),
    };
  }}
/>
I'm giving the <NavHeader /> access to the navigation object, a custom title and a Boolean to indicate whether the menu/stats icons should be visible or not. As shown in the screenshots above, they're only visible on the Game screen, otherwise there's the default back arrow.
The navigation object is needed for the icons' onPress callbacks, to push a different screen onto the Stack.
Creating this component:
NavHeader.js
import React from 'react';
import { StyleSheet, View, Text } from 'react-native';
import { MaterialIcons } from '@expo/vector-icons';

export default function NavHeader({ navigation, title, showIcons }) {

  const openSettings = () => navigation.push('settings');
  const openStats = () => navigation.push('stats');

  return (
    <View style={styles.container}>

      {showIcons && (
        <View style={styles.headerIcons}>
          <MaterialIcons
            name="menu"
            style={styles.icon}
            size={36}
            color="#038"
            onPress={openSettings}
          />
          <MaterialIcons
            name="timeline"
            style={styles.icon}
            size={36}
            color="#038"
            onPress={openStats}
          />
        </View>
      )}
      <Text style={styles.headerText}>{title}</Text>
    </View>
  );
}

const styles = StyleSheet.create({
  container: {
    flexDirection: 'row',
    justifyContent: 'flex-end',
    alignItems: 'center',
    backgroundColor: '#ccc',
  },
  headerText: {
    fontSize: 24,
    color: '#038',
  },
  headerIcons: {
    position: 'absolute',
    top: 0,
    left: 0,
    flexDirection: 'row',
    alignItems: 'center',
  },
  icon: {
    marginRight: 10,
  },
});
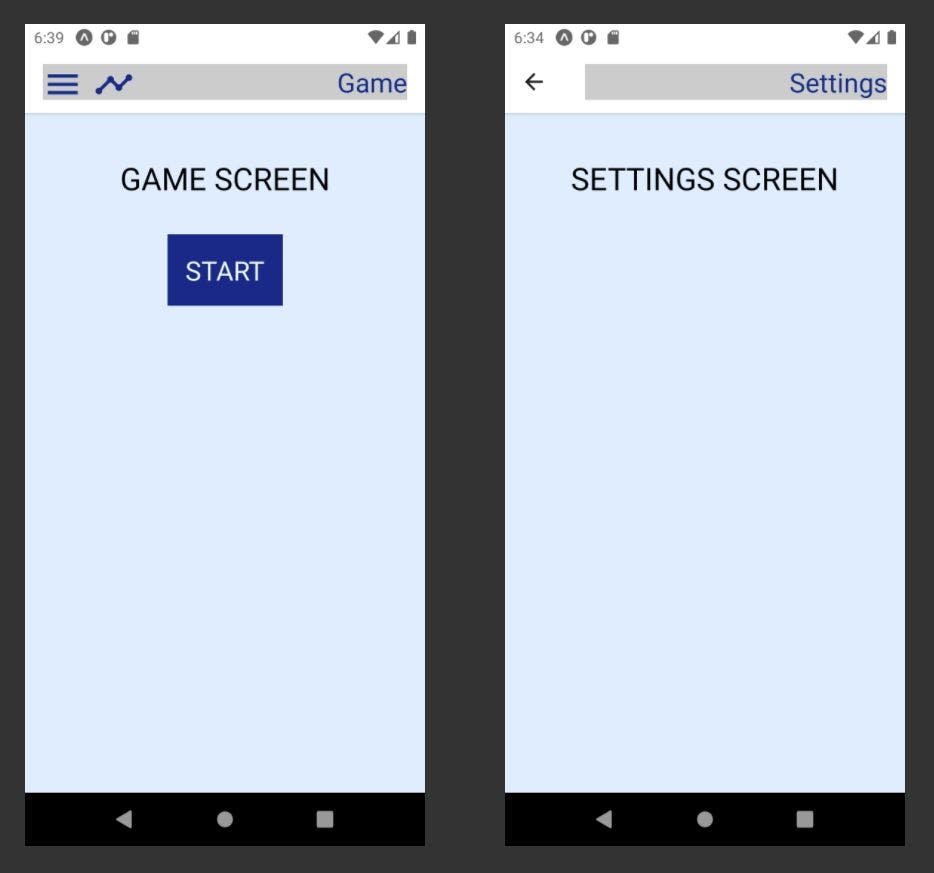
📱 Some styling issues
I've given the text and the icons a blue colour, and the component itself a grey background. There's still a few things to fix, because the background doesn't fully cover the header area, and the back button still has the default black colour:
This can be fixed by passing additional screenOptions to the <Stack.Navigator>, which are applied as default for every <Stack.Screen>:
const screenOptions = {
  headerStyle: {
    backgroundColor: '#ccc',
  },
  headerTintColor: '#038',
};


export default function App() {
  return (
    <NavigationContainer>
      <Stack.Navigator headerMode="screen" screenOptions={screenOptions}>

...
Note that any styles that are defined within the <NavHeader /> override these options.
So far, this is a solution that works for me. I can't say if it's the best possible way to achieve this result. React (Stack) Navigation has a multitude of options for configuration, I've only scratched the surface.
For further reading, check out link below ↓
📱 Resources
React Navigation examples and tutorial
📱 Thanks for reading!
If you find any errors or have additions, questions or just want to say hi, please leave a comment below, or get in touch via my website jsdisco.dev or Twitter.
Keep calm & code 👋