


Hi and welcome to part 3 of "How to build a Guitar with React" 🎸
After implementing the guitar sounds in part 2, this part will be all about visuals: The goal is to build a realistic fretboard, with the width of each fret gradually decreasing.
🎸 The Fretboard Component
I'll start with a reminder what the final fretboard will look like:

It will have three child components:
- a stateless
<FretboardBg />component (the background doesn't have to constantly re-render when I move the mouse over the fretboard, or clutter up the components that are responsible for functionality) - a
<FretMarkers />component where all the action happens - a
<MuteBtns />component
I'll start with <FretboardBg />. There's certainly a number of ways how to accomplish this - I could simply stuff some evenly-sized fret-<div>s into a container-<div>, but how lame would that be 😬 when we have JavaScript to build a realistic fretboard. I could also just use an image, but I'd have to know where each fret starts and ends to place the markers at their correct positions later. So I've decided to build an SVG for this.
🎸 Fretboard Setup
First of all, let's add the files and import them where we need them. In the Components folder, I'll create a parent component called Fretboard.js and its first child component FretboardBg.js.
FretboardBg.js
import React from 'react';

function FretboardBg(){

    return (
        <div className="fretboard-bg">

        </div>
    )
}

export default FretboardBg;
Fretboard.js
import React from 'react';
import FretboardBg from './FretboardBg.js';

function Fretboard(){
    return (
        <div className="fretboard-container">
            <FretboardBg />
        </div>
    )
}

export default Fretboard;
Guitar.js
import React, { useState } from 'react';
import GuitarBody from './GuitarBody.js';
import Fretboard from './Fretboard.js';

function Guitar(){

    const [currFrets, setCurrFrets] = useState([0,0,0,0,0,0]);

    return (
        <div className="guitar">
            <GuitarBody currFrets={currFrets} />
            <Fretboard />
        </div>
    )
}

export default Guitar;
Because most of the styling will be happening inside the SVG, there's only little CSS needed for this part:
App.css
.fretboard-container {
    display:flex;
    overflow:hidden;
    position:relative;
}
.fretboard-container svg {
    display:block;
}
.fretboard-bg {
    background:#402f1f;
}
🎸 Fretboard background SVG
If you've never used inline-SVGs before, here's your entry point to the MDN docs about SVG.
The things I'll use are nothing fancy and fairly straightforward, though, and I'll explain things along the way. The only elements we need are line, rect and circle.
What's nice about SVG is that you have a coordinate system (similar to the canvas element), so you can then use JavaScript to put all the lines for the strings and frets where they belong.
To start, I'll add another file to the utils folder called fretboardValues.js, where I do all the calculations.
The src folder should now look like this:
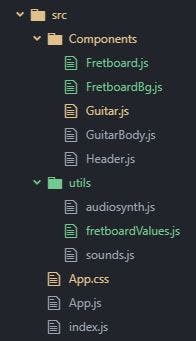
Setting up the SVG
For the size of the fretboard, I guess I could just hardcode some values, but I'd like to keep it a little more customisable, so the first thing that goes into my fretboardValues.js is an object for the dimensions.
const fbSize = {
    width:720,
    height:96
}

export { fbSize }
Now in FretboardBg.js, I can import that and start with an empty SVG container:
import React from 'react';
import { fbSize } from '../utils/fretboardValues.js';

function FretboardBg(){
    return (
        <div className="fretboard-bg">
            <svg
                xmlns="http://www.w3.org/2000/svg"
                viewBox={`0 0 ${fbSize.width} ${fbSize.height}`}
                width={`${fbSize.width}`}
                height={`${fbSize.height}`}
            >
            </svg>
        </div>
    )
}

export default FretboardBg;
The viewBox attribute on the SVG defines the coordinate system. It goes from x=0, y=0 (upper left corner) to x=720, y=96 (lower right corner). The width and height attributes are the CSS properties that define the actual size (in px). In my SVG, they have the same values as the viewBox, but they absolutely don't have to.
So far, the fretboard is just a brown rectangle, but we'll soon start filling it with strings and frets. If you've applied the same CSS as me, the guitar has a width of 768px with 16px padding, so the total width available for the fretboard is 736px. The SVG is only 720px in width, because the remaining 16px are reserved for the mute buttons on the left of the fretboard.
I'm using fixed units and overflow:hidden on the .fretboard-container because I don't want the SVG to responsively shrink when the size of the browser window gets narrower. Instead, there'll just be less frets visible, while everything else in the layout stays the same.
Alright, the SVG is set up - now we need to figure out the coordinates of the strings and frets.
The fretboardValues.js file - some fretboard maths
The (vertical) positions of the strings are easily calculated, as they're evenly distributed along the y-axis. Adding the function that'll do that for me to fretboardValues.js:
function createStringPositions(){
    return Array(6).fill(0).map((s,i) => (5.5-i) * fbSize.height/6);
}
The distances of the frets from the nut depend on the fret number and the total length of the string (=scale length). Fretting a string means effectively making it shorter - if you have a string with a certain length, a string with length · 2^(-1/12) is one half tone higher. We can put this into a formula:
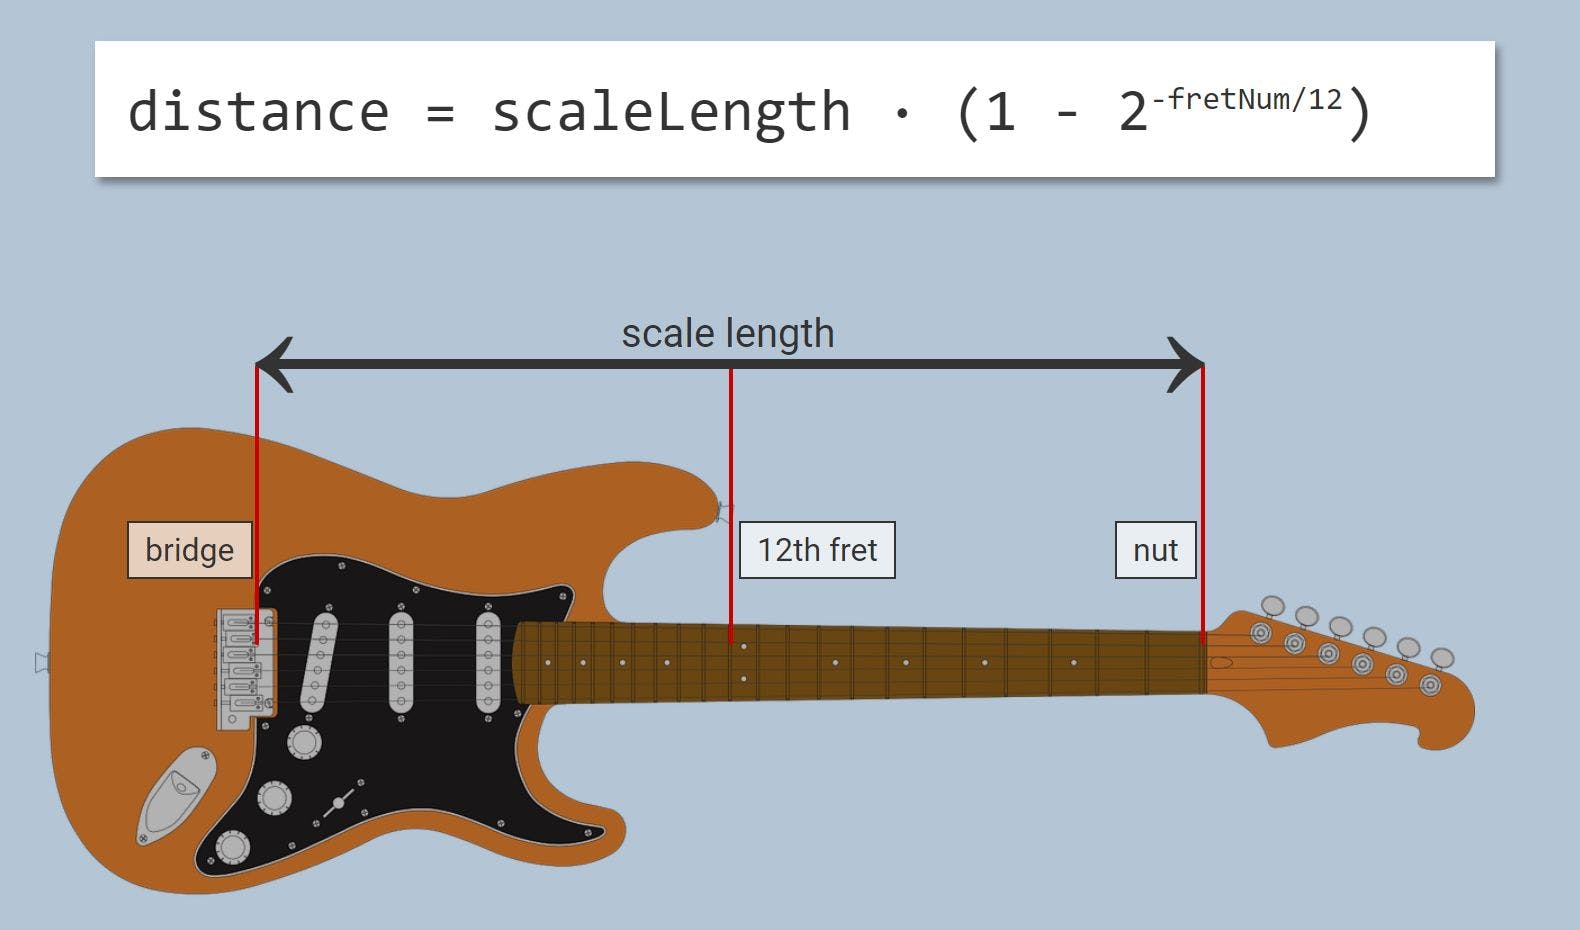
I don't have the whole guitar in my SVG, only the fretboard, so I don't know the scale length, but I know that I'd like my guitar to have 20 frets, and I'd like the last fret to be located at 95% of the total width of the fretboard (that will give some space to the right).
I'd also like some space to the left, so the first entry in my array of distances won't be a fret, but the position of the nut. Turning that into a function:
function createFretPositions(){
    const frets = 20;
    const dMax = 0.95;

    const scaleLen = dMax / (1 - Math.pow(2, -(frets + 1)/12));

    const perc = Array(frets + 1).fill(0)
        .map((d, n) => scaleLen * (1 - Math.pow(2, -(n + 1)/12)));

    return perc.map(f => f * fbSize.width);
}
And we're done with this file, those values are all we need to build the fretboard. Exporting everything:
const stringPositions = createStringPositions();
const fretPositions = createFretPositions();

export { fbSize, stringPositions, fretPositions }
Building the SVG
Updating the imports in FretboardBg.js:
import { fbSize, stringPositions, fretPositions } from '../utils/fretboardValues.js';
The strings and frets will be line elements, which are defined by their start and end coordinates (x1,y1 and x2,y2). We can add them by mapping over the stringPositions and fretPositions arrays and setting their coordinates and other attributes (the id isn't really necessary, but it helps when inspecting the DOM):
FretboardBg.js
const strings = stringPositions.map((pos, i) => {
        return (
            <line
                key={`string-${i}`}
                id={`string-${i}`}
                x1="0"
                y1={pos}
                x2={fbSize.width}
                y2={pos}
                stroke="#ddd"
                strokeWidth="2"
            />
        )
    })

const frets = fretPositions.map((pos, i) => {
        return (
            <line
                key={`fret-${i}`}
                id={`fret-${i}`}
                x1={pos}
                y1="0"
                x2={pos}
                y2={fbSize.height}
                stroke="#b93"
                strokeWidth="3"
            />
        )
    })
I'll also add a dark rectangle as some visual indication for where the nut is and where the first fret begins:
const nut = <rect
        x="0"
        y="0"
        width={fretPositions[0]}
        height={fbSize.height}
        fill="rgba(0,0,0,0.5)"
    />
Throwing it all into the SVG...
return (
        <div className="fretboard-bg">
            <svg
                xmlns="http://www.w3.org/2000/svg"
                viewBox={`0 0 ${fbSize.width} ${fbSize.height}`}
                width={`${fbSize.width}`}
                height={`${fbSize.height}`}
            >
                {nut}
                {frets}
                {strings}
            </svg>
        </div>
    )
...and voilà 😃
Bonus: Fretboard dots
A real guitar fretboard has dots on certain frets that serve as a visual guide. Often, the 12th fret (where the note is 12 halftones = 1 octave higher) has two dots. I want my fretboard to be pitch perfect ✨ so those have to be added no matter what.
A circle element in an SVG is defined by its radius r and the coordinates cx,cy of its center point. The values of those can again be retrieved from the fretPositions and fbSize:
const dotFrets = [3, 5, 7, 9, 12, 15, 17, 19];

const dots = dotFrets.map((fret,i) => {
    if (fret === 12){
        return (
            <g key={`dot-${fret}`} id={`dots-${fret}`}>
                <circle
                    cx={(fretPositions[fret]+fretPositions[fret-1]) / 2}
                    cy={2 * fbSize.height/6}
                    r="3"
                    fill="#a98"
                />
                <circle
                    cx={(fretPositions[fret]+fretPositions[fret-1]) / 2}
                    cy={4 * fbSize.height/6}
                    r="3"
                    fill="#a98"
                />
            </g>
        )
    }
    return (
        <circle
            key={`dot-${fret}`}
             id={`dot-${fret}`}
             cx={(fretPositions[fret]+fretPositions[fret-1]) / 2}
             cy={fbSize.height/2}
             r="3"
             fill="#a98"
         />
    )
})


return (
        <div className="fretboard-bg">
            <svg
               ...
            >
                {nut}
                {frets}
                {strings}
                {dots}
            </svg>
        </div>
    )
The <g> (= group) element is just a container to wrap both circles, similar to a <div> in HTML.
That's it, we have a fully realistic looking fretboard now 🤟
🎸 Outlook for the next part
In part 4, we'll...
- add the
<MuteBtns />component - let it update the so far unused
currFretsarray (finally that linter warning will go away) - make some changes to sounds.js and Guitar.js to implement the mute functionality
(Code for this part here 👉 on GitHub)
🎸 Thank you for reading!
I hope you enjoyed coding along so far. If you found any mistakes, if something isn't working as expected, if you see room for improvement anywhere, or if you just happen to like this post, I'd appreciate your feedback in the comment section below. You can also @ me on Twitter. If you'd like to read more like this, I invite you to subsribe to my newsletter. Until next time 👋